Need help in using our WordPress theme?
Portfolio grid view is made by using the WPBakery Page Builder.

|
To get the same look as the sample above, follow these steps:
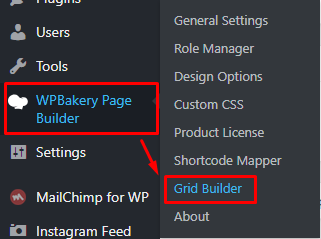
Step 1 - In your wordpress dashboard, go to WPBakery Page Builder > Grid Builder, and click the Add New button.
Step 2 - You will be directed to the Add Grid template page.
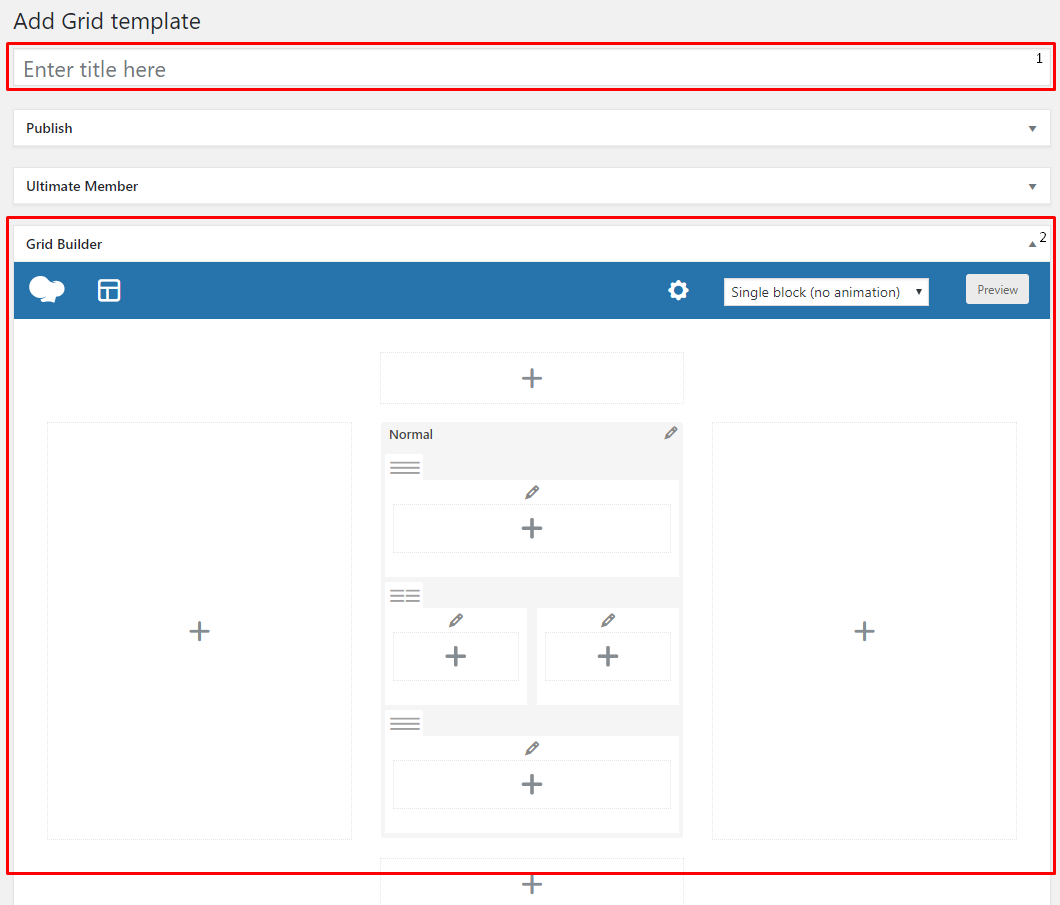
- Title - The title of the grid template you are making.
- Grid Builder - Area where you can customize the look of your grid template.
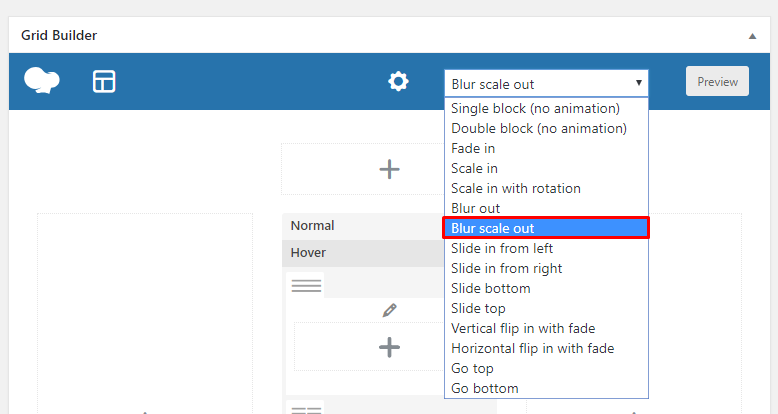
Step 3 - To get the same look as the sample, in the Grid Builder, change the drop-down box to Blur scale out. This will give your grid an overlay of color if hovered.
Step 4 - Set the following information in the Normal tab’s settings.
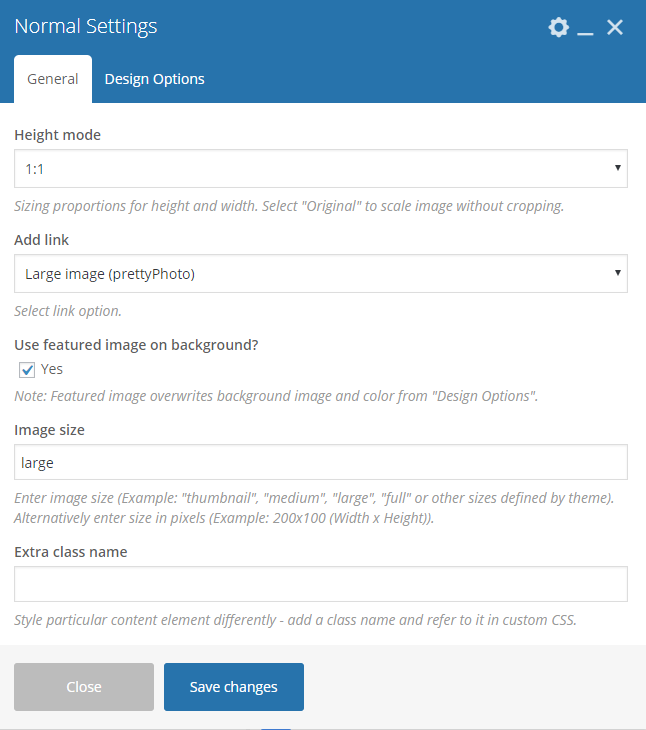
General tab
- Height mode - 1:1
- Add link - Large Image (PrettyPhoto)
- Use featured image on background? - Yes
- Image size - Large
Step 5 - Set the following information in the Hover tab’s settings.
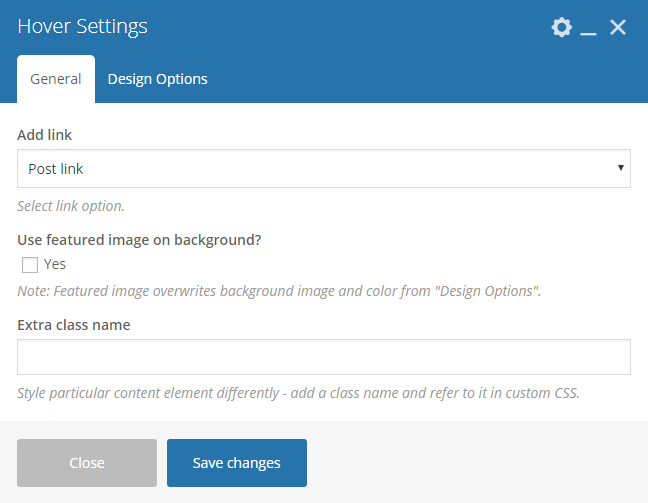
General tab
- Add link - Post Link
Design Options tab
- Background - rgba(10,10,10,0.37)
Step 6 - Add the following elements in the Hover tab.
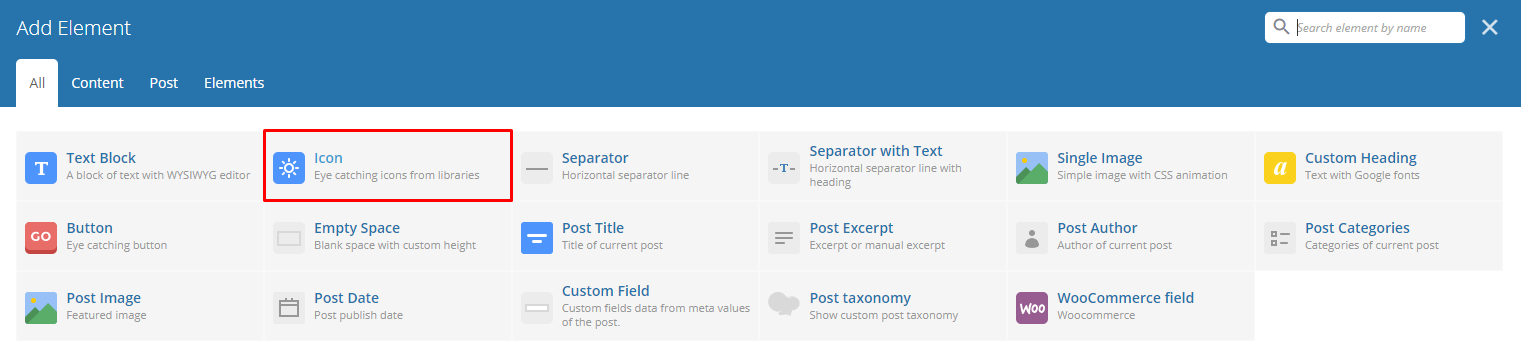
Icon - The icon that will show in the grid when you hover your mouse pointer.
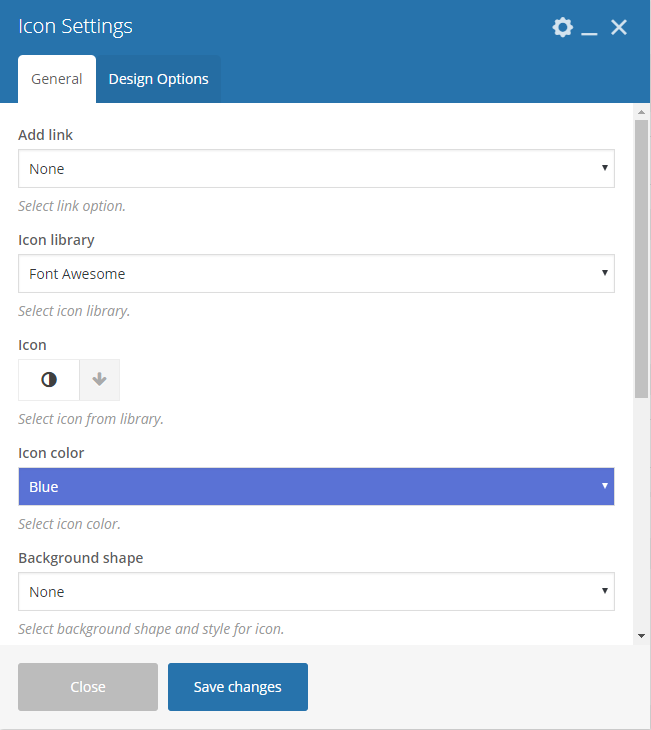
- Icon library - Font Awesome
- Icon - Choose what you like.
- Icon color - Choose what you like.
- Background shape - None
- Size - Normal
- Icon alignment - Left
Step 7 - Click on the Plus sign (+) below, and add the following element:
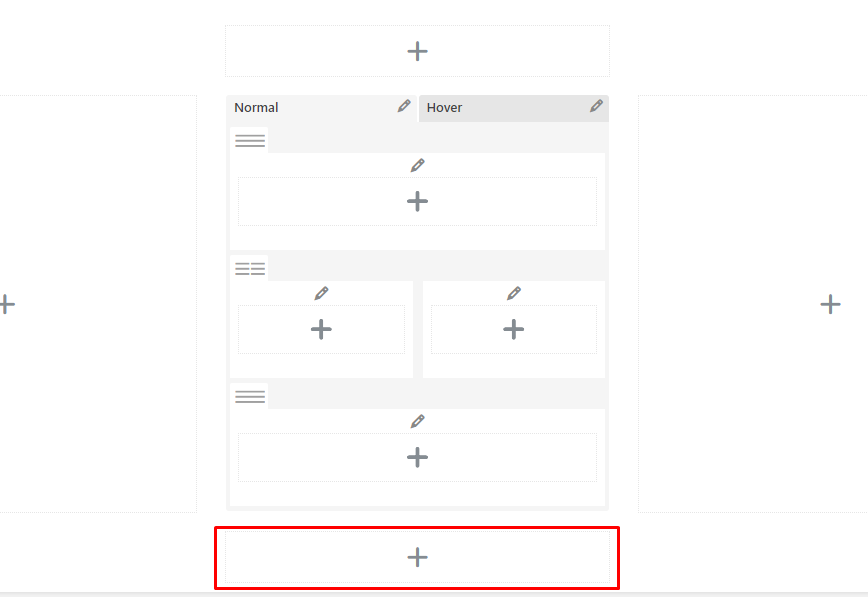
Post Title - Where the title of the item that is used will show.
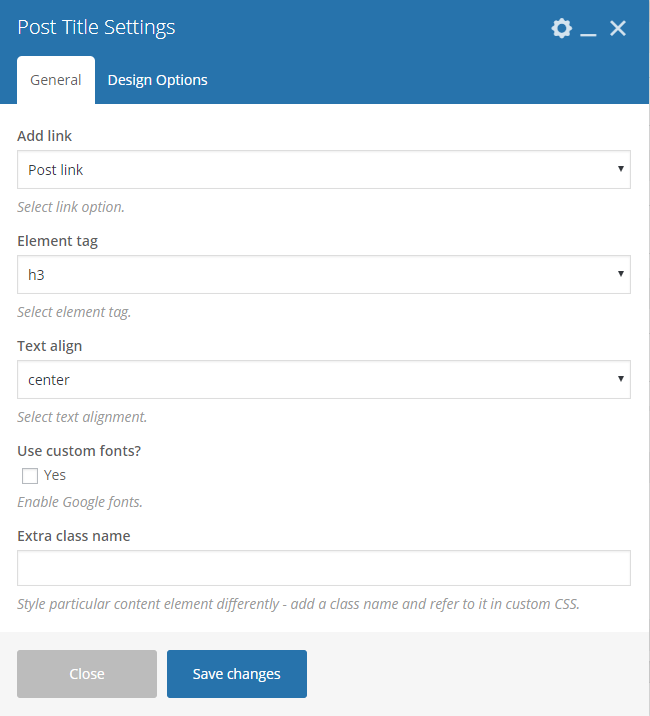
- Add link - Post Link
- Element tag - h3
- Text align - center
Post taxonomy - The category of the item being shown.
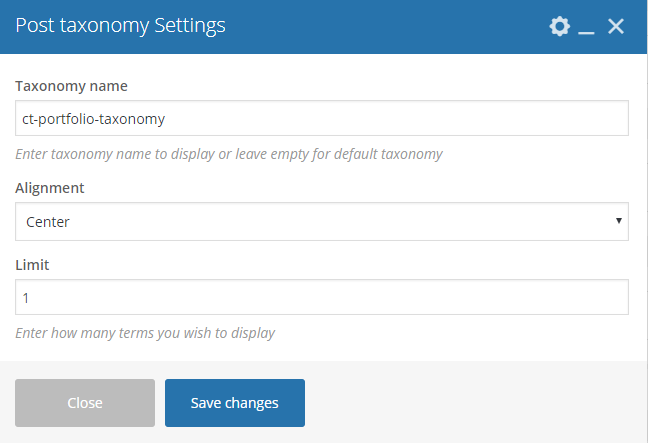
- Taxonomy name - ct-portfolio-taxonomy
- Alignment - Center
- Limit - 1
Step 8 - Once done with all the changes, click Publish to save.